Before getting into the nail game, I used to think all you needed was a bottle of polish and away you go. Wrong! I've listed below some essential items, (and some not so), that will help you achieve great nail art at home.

The most important thing to consider, hand and nail care. Regular moisturisation is essential if you are into flashing your coloured nails around. Polishes, removers and nail polish all dry out the skin, and failing to get extra moisture in the skin will affect how your manicure looks.
Find a thick moisturiser you like, and use it. I use a combination throughout the day, and recently I've started using moisturiser gloves. They are fantastic for intense moisturisation, I would recommend this to anyone.
Cuticle removers are also a useful product. When applied they allow for easier removal of the dead skin that is prone to drying out, and causing the lifting of nail polish. Use removers along with a remover tool or orange stick, and always follow the instructions. Follow up with a cuticle balm or oil to keep your fingertips a picture of health.

Nail brushes, clippers, files and cuticle pushers. All tools you should be using to maintain your nails.
Files are down to personal choice. You can have metal, glass or emery board. I haven't seen much fans, but I do like my personal metal one, especially for the handbag. Like most good files, they are double sided with course grit and fine grit, depending on the reason for filing, (smoothing or reducing length). I also like the pointed tip for under the nail tip and around the cuticles. Try them all and find what you like.
Orange sticks and cuticle pushers both do the same thing, and can be used alongside the remover creams, which help lift dead skin on the nail plate more gently. Orange sticks are also a good tool for placing glitters and rhinestones on the nail.

Base coat is a must before applying polish. Not only does a good base coat protect the nail plate from drying and staining, it also helps your beautiful polish stick to your nail, prolonging colour and helping fight against chips and peeling.
There are many base coats out there, some basic and some are more specialised, with combined treatments from ridge filling and strengthening to growth serum and glitter peel off.
Any base coat is better than none at all, so don't skip this step. Your nails will thank you for it.
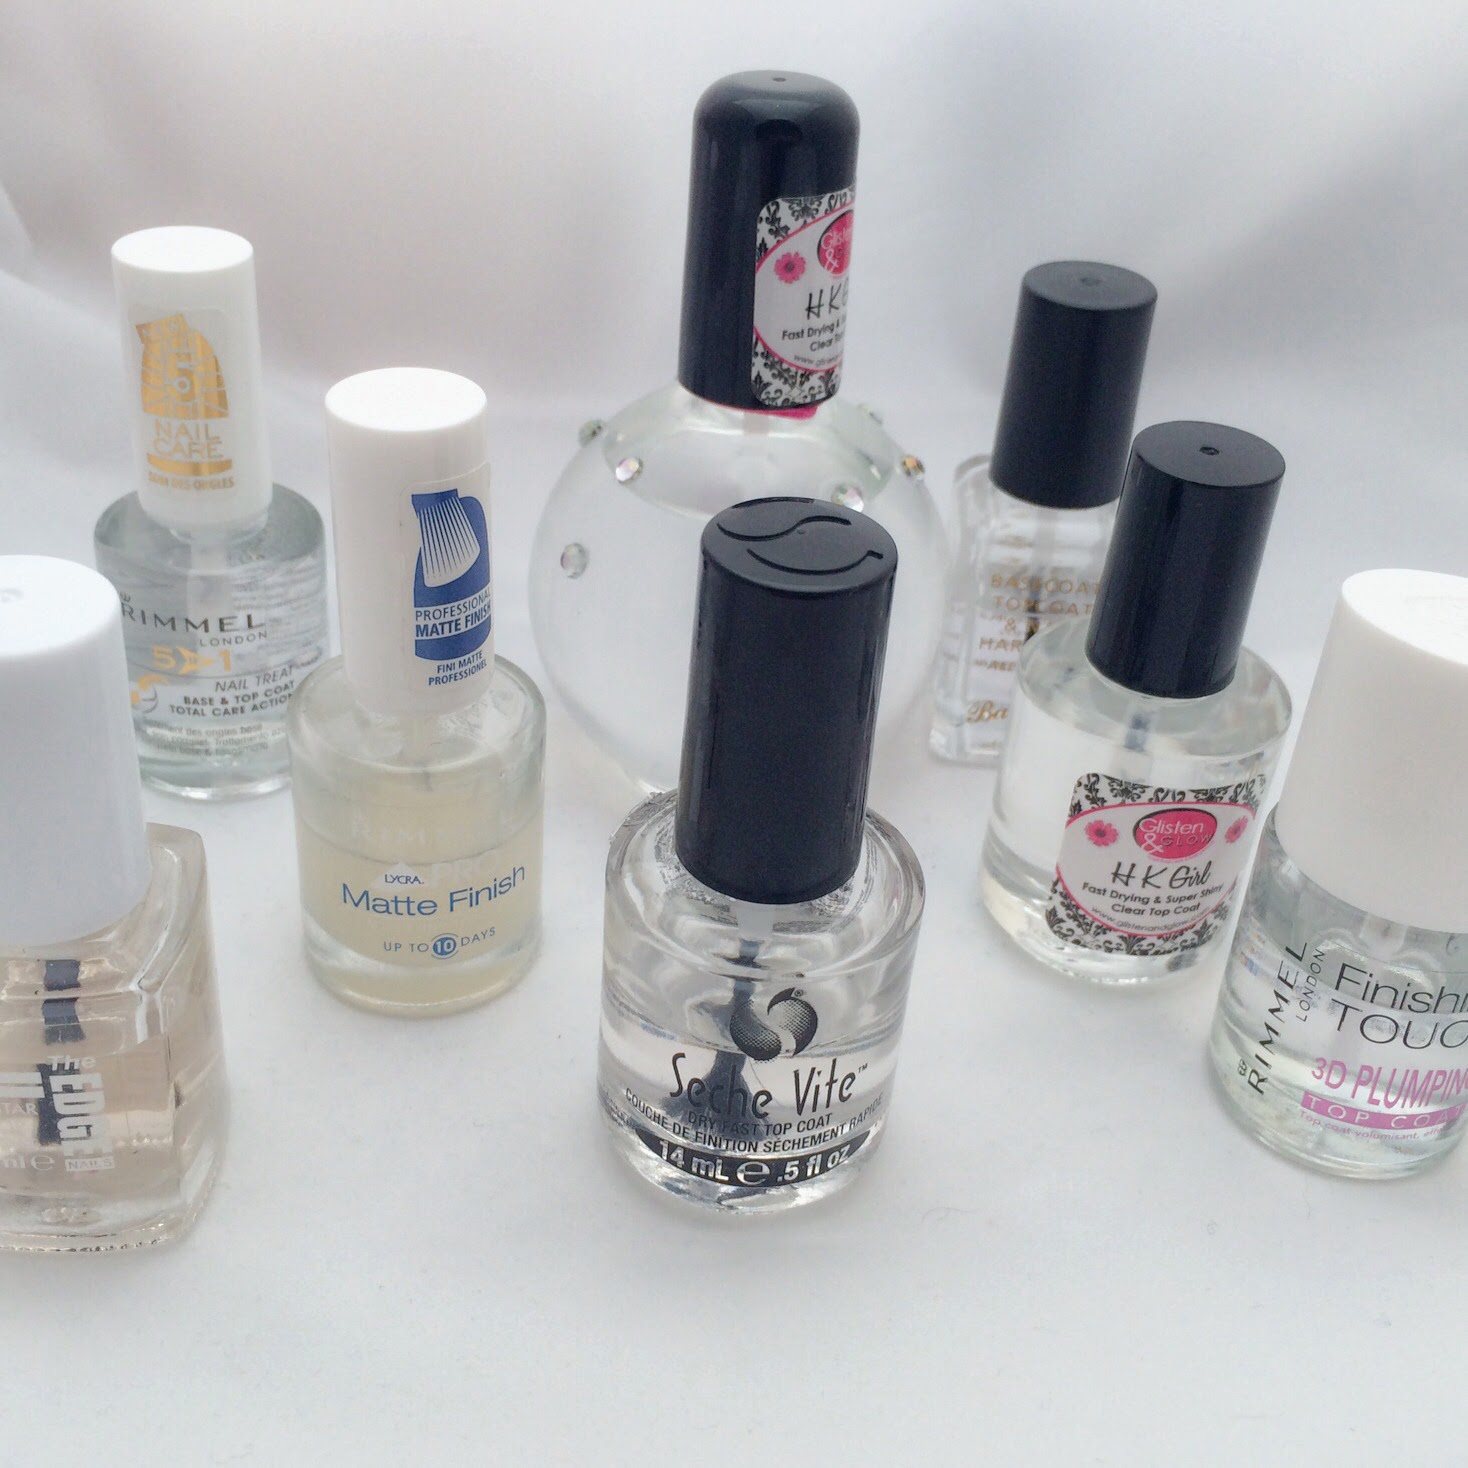
You've applied polish, or completed your nail art. Now you want to prolong and protect it. As with base coats, top coats are essential, and the choice is huge.
Figure out what you want from a top coat. For me it was fast drying, glossy and nail art friendly, (no streaks), and protection. Seche Vite was the one for me for a long time, literally it changed my life, but recently I've switched to H K Girl - Glisten & Glow.
There are other options for top coats that have special effects, such as matte, pearlescent, opalescent, holographic, textured and glitter, the list goes on, all of which open up new possibilities for nail art.

If you've taken the time to create a beautiful mani, don't ruin it by forgetting the details. Clean up around your cuticles and edges and guaranteed, your manicure will look 100% better.
You can use a cotton bud dipped in acetone to do this, but a better method is using an old make up brush, (flat angled liner brush), dipped in acetone, to run around the edges of the nail. It's more precise, uses less product and it's reusable.
Now acetone v non acetone remover? Well that is up to you. I prefer pure acetone for many reasons. Be warned, it will dehydrate your skin, but if you have a good moisturising regime, and wash your hands after use you should be fine.
A good investment is a menda dispenser for your acetone / remover. I have one for each, one of which I recycled from a Mr.Muscle cleaner. Both of these dispense a small amount of liquid in the bowl at the top, allowing you to dip into it, and the pump action doesn't allow your soiled liquid to mix into clean product.

Nail art brushes come in a variety of styles for an array of different purposes, just like normal artists brushes. You can buy these individually or in sets, but you really have to try them out as there is some good and some bad ones out there. A minimal set would have a long striping brush, a small detailing brush, a fan brush for blending, a one stroke brush and a dotting tool. The tool you choose depends on the work you are doing.
Always clean your brushes immediately after use, and regularly apply some oil to the bristles to keep them in good condition. I clean my brushes in pure acetone, just dip and wipe onto a paper towel and keep repeating this until they are clean. Store your brushes flat or point up, and avoid pulling the hairs.

These are dotting tools, also known as marbling tools. They are double ended ,with one large and one small end, and they come in varying sizes.
These are used for producing a variety of dots by dipping into to polish and dotting it onto the nail. Pretty simple really.
For marbling, you put some coloured drops of polish on the nail (two or more colours), and use the tool to swirl the them together.

You can use regular polish for nail art, anything goes really, but acrylic paint is also a very useful thing to have. It can be painted onto dry nail polish, and removed with alcohol without affecting the base polish at all. Useful for learning and practicing new designs.
Acrylic paint can also be mixed and diluted, so any colour is possible with a limited selection in your stash. It also dries fast on the nail, but can last much longer on the palette compared to regular nail polish.
Finish your design and apply your top coat to see your art work at its best.

Embellishments. Love them or hate them, there are plenty out there. From caviar beads, glitters, rhinestones, stickers, foils, feathers and studs the list is endless. This is some of what I have, but I rarely use them.
Each have a method of application and although clear polish will do for many of these, I would recommend proper nail glue to apply some of the larger stones and charms or they simply won't last.

Nail art pens can be useful to have and come in a variety of styles. These are 2 way pens, with a nib and a striper brush enclosed inside. The flow is controlled by squeezing the tube.
These pens tend to produce a raised 3D design, which unfortunately, does take a while to dry, but you do get the control of a pen which can be easier than a brush.

Stamping plates. What a great invention. If you lack technique or comfort in freehand work, then nail stamping can be a wonderful technique to master. Even for seasoned nail artists, nail stamps can be great for producing background work for your freehand.
When looking into buying stamping plates, try and avoid unbranded suppliers, as the quality of the plate cannot be guaranteed. Instead, go for brands like Konad, MoYou or Bundle Monster who specialise in producing beautiful and quality plates that transfer nail polish well. (Other good brands are available.)
Good stamping plates are an investment, and the results you produce are only limited by your creativity. Look out for nail stamping tutorials that will teach you all you need to know.

If you have nail stamping plates, then you need a stamping tool and a scraper.
If you buy a kit, it will most likely come with a small stamper and scraper. These are fine to use, but I prefer the larger double sided tool. This tool can pick up much larger images and is easier to use. Also, because the stamping head is removable you can do techniques like stretching the images.
Scrapers are important. Without a good one, you won't be able to pick up a clean image onto the stamping tool. It's best to choose a large one that is easy to hold, as you need to work quite fast during stamping and there's no time for fumbling around. Most stampers would say using and old plastic card like a credit or gift card is the best thing to use.

Tape, tape, tape. Wether it's sticky tape to mask your skin during messy processes, or specialised nail striping tape or nail vinyl stickers, all of these are very cheap and useful in creating eye catching designs.
If you are applying sticky tape to your painted nail, ensure that the polish underneath is completely dry before applying, as taking off the tape tends to lift the semi wet polish, and it's so frustrating when this happens. Another useful tip is to stick the tape to your skin before applying it to your nail to reduce the stickyness.
You can buy nail vinyls, like french tip guides, in a variety of pre cut shapes, with chevrons being a favourite of most.
No comments:
Post a Comment